

AI Integration Quick Reference
AI Integration Quick Reference
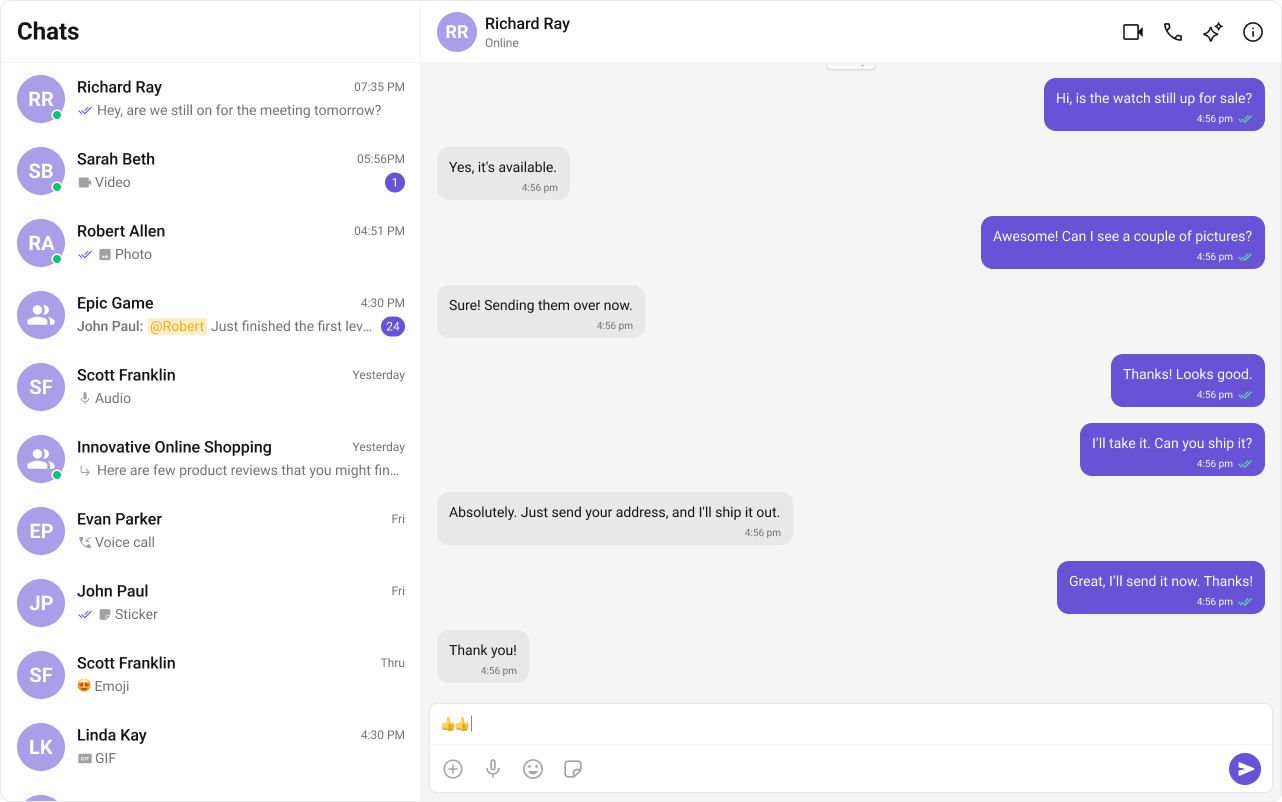
What You’re Building
Three sections working together:- Sidebar (conversation list) — shows all active conversations (users and groups)
- Message view — displays chat messages for the selected conversation in real time
- Message composer — text input with support for media, emojis, and reactions
Step 1 — Create the Sidebar Component
src
app
CometChatSelector
CometChatSelector.tsx
CometChatSelector.css
- TypeScript
- CSS
CometChatSelector.tsx
Step 2 — Create the CometChatNoSSR Component
This component handles init, login, and renders the full chat experience. It runs client-side only.src
app
CometChatNoSSR
CometChatNoSSR.tsx
CometChatNoSSR.css
- TypeScript
- CSS
CometChatNoSSR.tsx
Step 3 — Disable SSR and Add the Route
CreateCometChat.tsx inside the routes folder. This uses lazy loading and a mounted check to ensure CometChat only runs client-side.
routes/CometChat.tsx
routes.ts
window, WebSocket, document). The lazy import + mounted check ensures the component only renders on the client.
Step 4 — Run the Project
- npm
- pnpm
- yarn
/chat (e.g. http://localhost:5173/chat). You should see the conversation list on the left. Tap any conversation to load messages on the right.
Next Steps
Theming
Customize colors, fonts, and styles to match your brand
Components Overview
Browse all prebuilt UI components
React Router Integration
Back to the main setup guide
Core Features
Chat features included out of the box