

AI Integration Quick Reference
AI Integration Quick Reference
React Native UI Kit Sample App
Reference implementation of React Native UI Kit and APNs Push Notification setup.
What this guide covers
- CometChat Dashboard setup (enable push, add APNs provider).
- Platform credentials (Apple entitlements).
- Copying the sample notification stack and aligning IDs/provider IDs.
- Native glue for iOS (capabilities + PushKit/CallKit for VoIP).
- Token registration, navigation from pushes, testing, and troubleshooting.
What you need first
- CometChat app credentials (App ID, Region, Auth Key) and Push Notifications enabled with an APNs provider (React Native iOS); add an APNs VoIP provider if you plan to receive call invites via PushKit.
- Apple push setup: APNs
.p8key/cert in CometChat, iOS project with Push Notifications + Background Modes (Remote notifications) permissions. - React Native 0.81+, Node 18+, physical iOS device for reliable push/call testing.
How APNs + CometChat work together
- APNs (iOS) is the transport: Apple issues the APNs token and delivers payloads to devices.
- CometChat provider holds your credentials: The APNs provider you add stores your
.p8key/cert. - Registration flow: Request permission → APNs returns token → after
CometChat.login, register withCometChatNotifications.registerPushToken(token, platform, providerId)usingAPNS_REACT_NATIVE_DEVICE→ CometChat sends pushes to APNs on your behalf → the app handles taps/foreground events viaPushNotificationIOS.
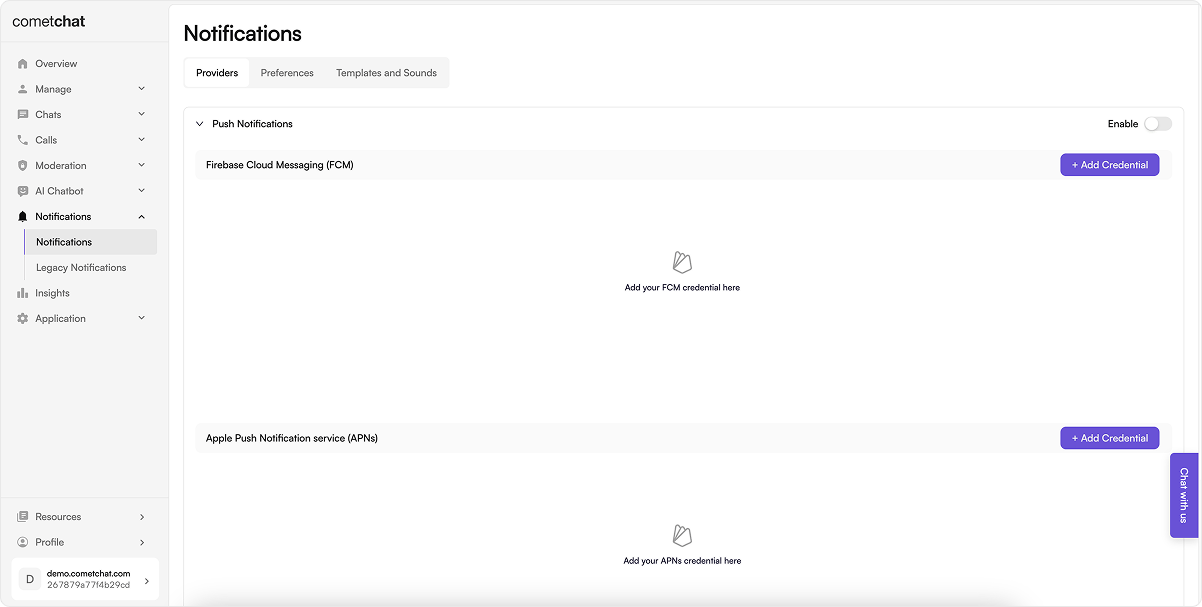
1. Enable push and add providers (CometChat Dashboard)
- Go to Notifications → Settings and enable Push Notifications.
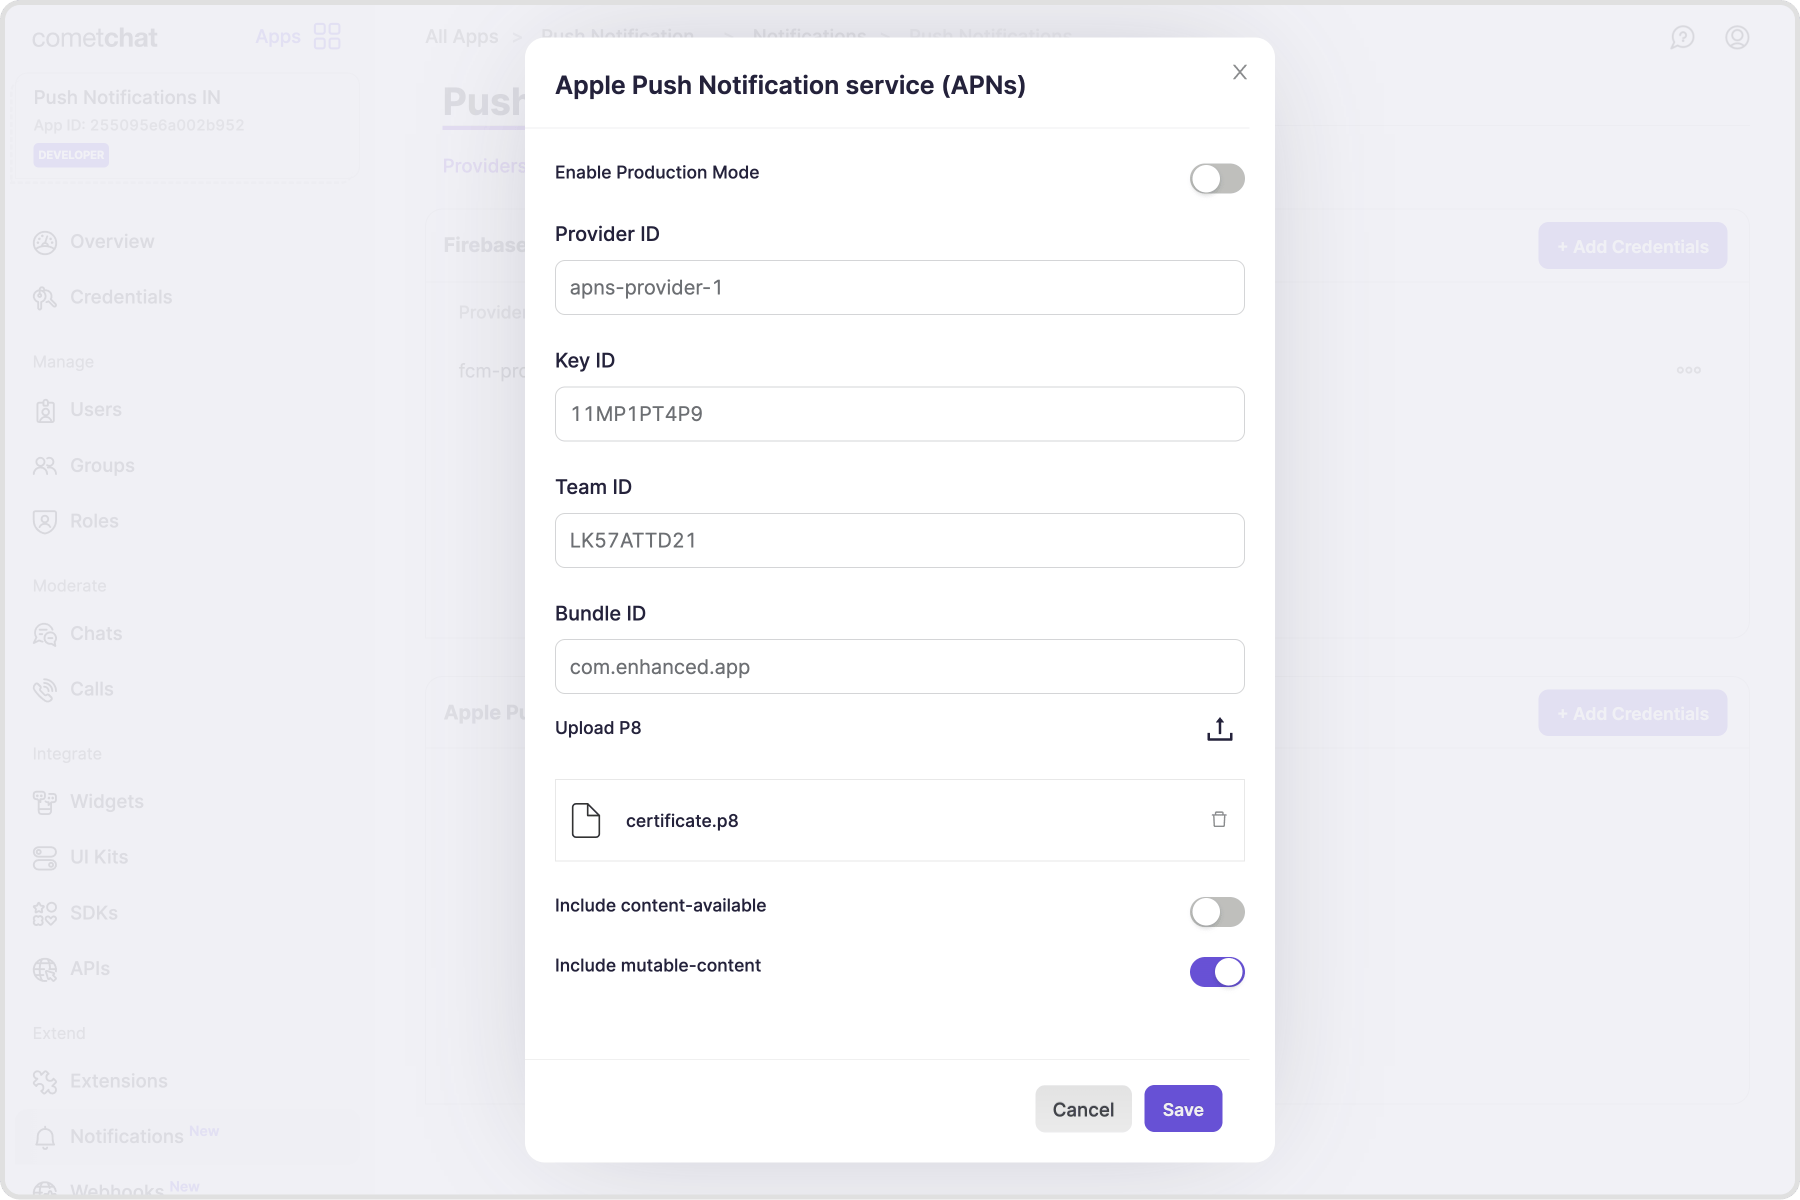
- Add an APNs provider for iOS and copy the Provider ID.
2. Prepare platform credentials
Apple Developer portal
For iOS we use Apple Push Notification service (APNs) for both standard and VoIP pushes. Follow these steps to create the credentials you’ll upload to CometChat.1
Create a certificate signing request (CSR)
- Open Keychain Access → Certificate Assistant → Request a Certificate From a Certificate Authority.

- In Certificate Information, enter your Apple Developer email and a common name; choose Saved to disk, then Continue.
- Save the CSR file locally—this contains your public/private key pair.
2
Create the APNs SSL certificate (.cer)
- Sign in to the Apple Developer Member Center → Certificates, Identifiers & Profiles.

- Click + to add a certificate.

- Under Services, pick Apple Push Notification service SSL (Sandbox & Production).

- Select your App ID, upload the CSR, continue, and download the generated
.cerfile.


3
Generate the APNs Auth Key (.p8)
- In Certificates, IDs & Profiles, open Keys → click +.
- Enter a key name, check Apple Push Notification service (APNs), then Continue → Register.
- Download the
.p8file and note the Key ID, Team ID, and your Bundle ID—you’ll enter these in CometChat. - (Optional) If you still use
.p12, export it from the downloaded key without an export password; keep it handy for upload.
3. Local configuration
- Update
src/utils/AppConstants.tsxwithappId,authKey,region, andapnProviderId. - Keep
app.jsonname consistent with your bundle ID / applicationId.
3.1 Dependencies snapshot (from Sample App)
Install these dependencies in your React Native app:4. iOS App setup
4.1 Project Setup
Enable Push Notifications and Background Modes (Remote notifications) in Xcode.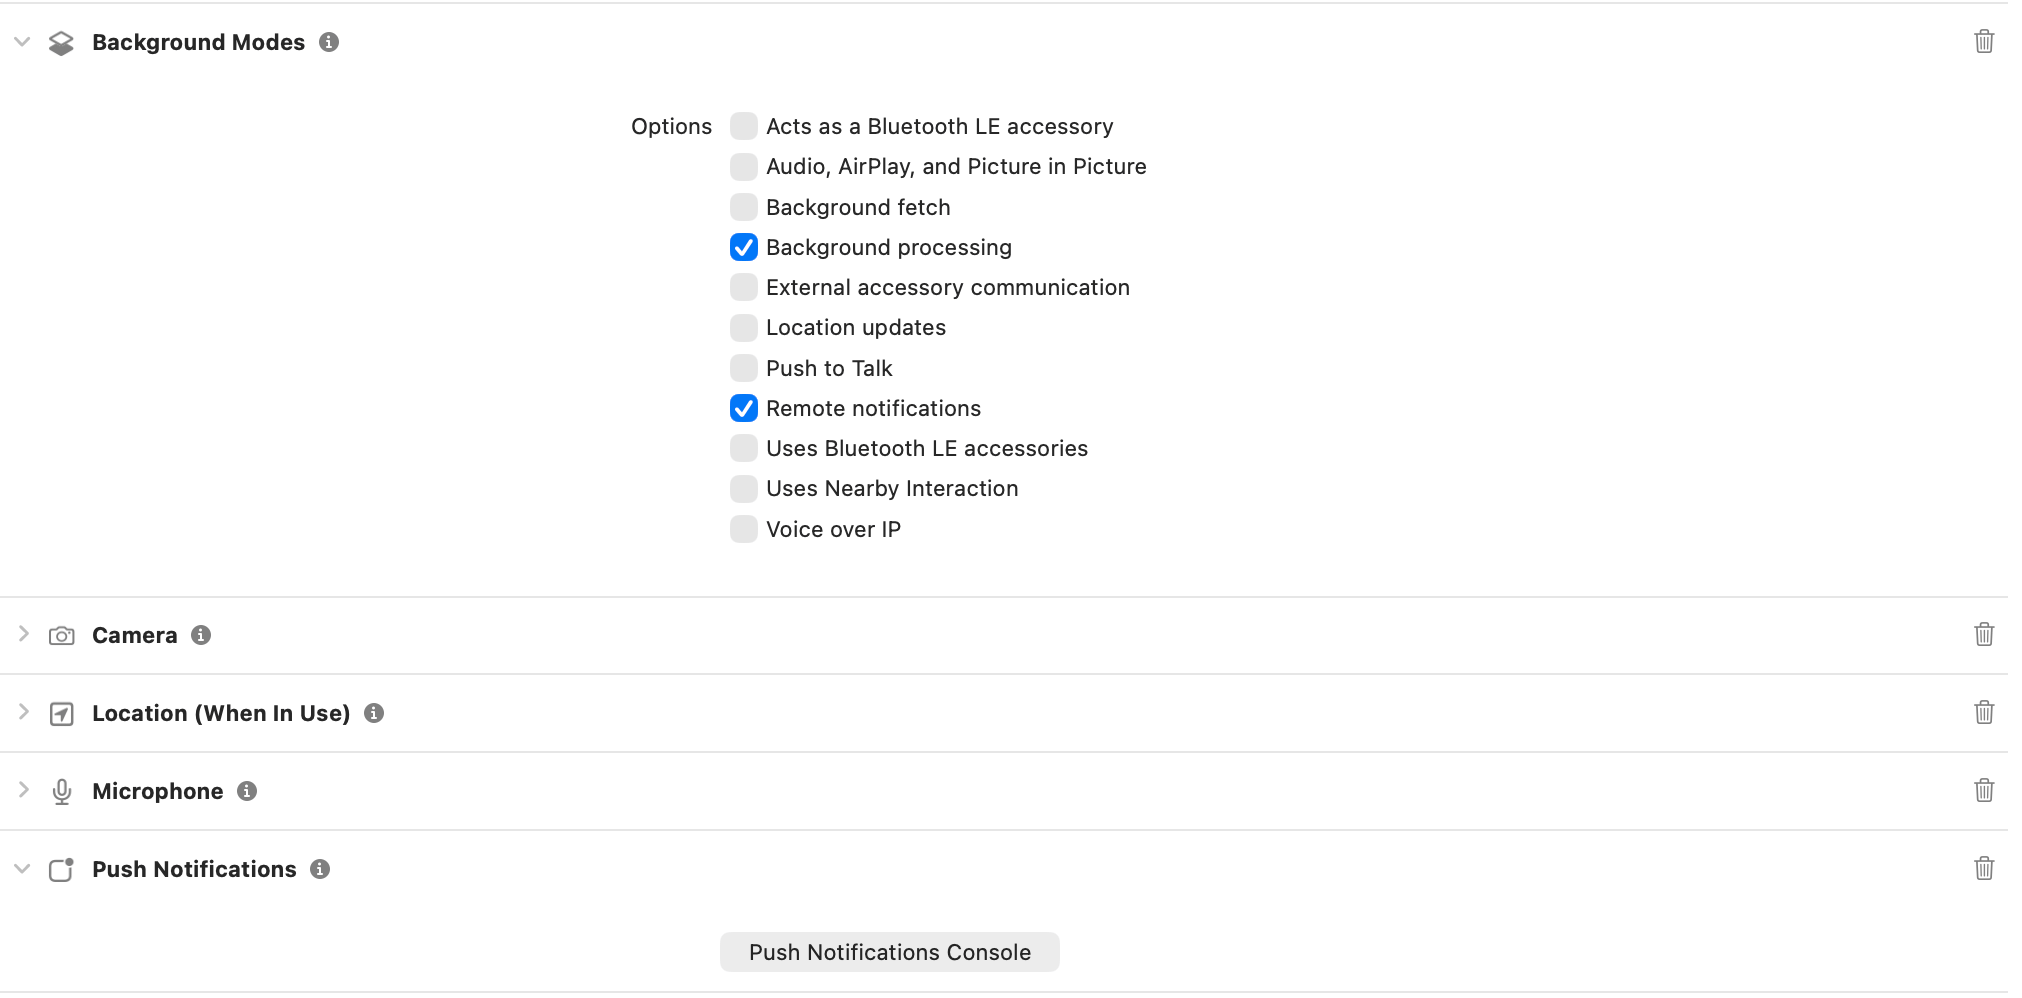
4.2 Install dependencies + pods
After running the npm install above, install pods from theios directory:
4.3 AppDelegate.swift modifications:
Add imports at the top:UNUserNotificationCenterDelegate to the AppDelegate class declaration:
didFinishLaunchingWithOptions method:
Podfile to avoid framework linkage issues:
4.4 App.tsx modifications:
Import CometChatNotifications and PushNotificationIOS:5. VoIP call notifications (iOS)
These steps are iOS-only—copy/paste and fill your IDs.5.1 Enable capabilities in Xcode
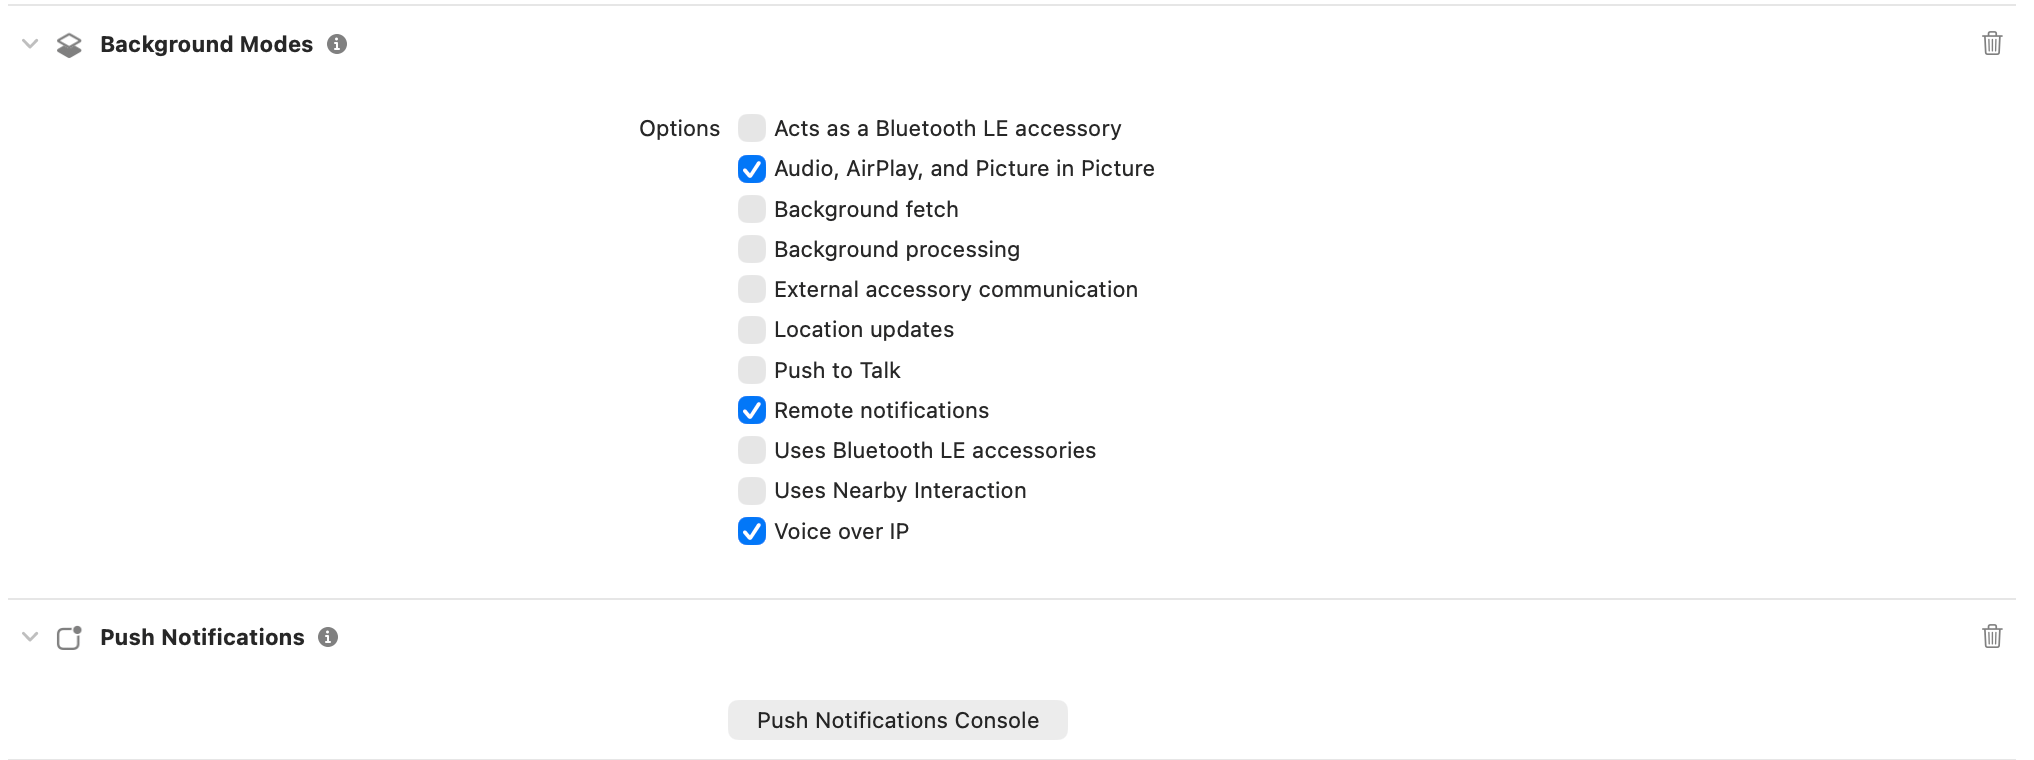
- Target ➜ Signing & Capabilities: add Push Notifications.
- Add Background Modes → enable Voice over IP and Remote notifications.
- Run on a real device (PushKit/CallKit don’t work on the simulator).
5.2 AppDelegate.swift (PushKit + CallKit bridge)
Update yourAppDelegate to register for VoIP pushes ASAP and forward events to JS/CallKeep:
5.3 Drop in VoipNotificationHandler.ts
Handles CallKeep UI, defers acceptance until login, and listens for PushKit events.
5.4 Add PendingCallManager.ts
Stores an answered call during cold start so you can accept it after login/navigation is ready.
5.5 Wire App.tsx for APNs + VoIP token registration and handler init
5.6 VoIP push payload (APNs / PushKit)
Send a VoIP push withpush_type=voip via APNs using a payload shaped like:
6. Handling notification taps and navigation
To handle notification taps and navigate to the appropriate chat screen, you need to set up handlers for both foreground and background notifications.7. Badge Count Implementation
CometChat’s Enhanced Push Notification payload includes anunreadMessageCount field that represents the total number of unread messages across all conversations for the logged-in user. You can use this value to update the app icon badge, providing users with a visual indicator of unread messages.
7.1 Enable Unread Badge Count on the CometChat Dashboard
1
Navigate to Push Notification Preferences
Go to CometChat Dashboard → Notifications Engine → Settings → Preferences → Push Notification Preferences.
2
Enable the Toggle
Scroll down and enable the Unread Badge Count toggle.
unreadMessageCount field in every push payload sent to your app.
7.2 Expected Payload Format
CometChat sends APNs payloads with the following structure:The
aps.badge field is set server-side by CometChat. iOS automatically updates the app icon badge when the push notification is delivered.7.3 Handle Badge Count from Notifications
Update your iOS notification handler to set the badge count programmatically:7.4 Register Notification Listener
In yourApp.tsx, set up the notification listener:
7.5 Clear Badge When App Becomes Active
Clear the badge count when the app launches or returns to the foreground:7.6 Clear Badge on Logout
When a user logs out, clear the badge so it doesn’t show a stale count on the login screen or for the next user:7.7 Clear Badge on Fresh Install / No Logged-In User
On iOS, the badge count may persist after app uninstall and reinstall in certain scenarios. Clear the badge during app initialization when no user is logged in:7.8 Clear Badge in Login Listener (Safety Net)
Register a login listener to clear the badge on logout as a backup mechanism:7.9 Key Implementation Notes
7.10 Cross-Platform App State Handler
If you’re building a cross-platform app, use this combined handler for both iOS and Android:8. Testing Checklist
- Install on a physical iOS device, log in, and verify APNs token registration succeeds.
- Send a message from another user:
- Foreground: Banner appears unless that chat is already open.
- Background/terminated: Tap opens the correct conversation; handler runs.
- VoIP: Send a PushKit VoIP push (payload above); expect CallKit incoming UI; answer and confirm CometChat call connects; end clears the dialer.
- Rotate tokens (reinstall or revoke) and confirm
onTokenRefreshre-registers the new token.
9. Troubleshooting
Next Steps
Push Notifications (Android)
Set up FCM push notifications for Android
Push Notification Content Customization
Strip HTML tags and customize notification content
Send Messages
Learn how to send different types of messages
Receive Messages
Handle incoming messages in real time